Showing posts with label crafts. Show all posts

Thursday, December 17, 2009

Homemade Christmas


I love making homemade decorations for Christsmas (and other holidays). This pillow, above, is the only cross-stich I've ever completed to the point of being ready to display! I did the cross stitch about 15 years ago and my husband's great aunt sewed it into a little pillow. I hang it on a doorknob every year.


My mother-in-law and I painted these 4 little snowmen when I was on bedrest with Alex over 9 years ago! Aren't they cheerful?


My mother-in-law used to spend a lot of time around the holidays making crafts. (We live in different states.) We made this snowman out of 2 styrofoam balls and a sock. The buttons, nose, and eyes are straight pins with round balls. The nose is a toothpick which was painted orange. And, the cheeks were 'painted' with a little blush. We made the hat out of felt - proabably the hardest part of the project! Didn't he turn out great? I'm hoping to do some crafts with Alex AND my mother-in-law while we visit this Christmas.

Saturday, December 12, 2009

Ivory Snowman


Tonight, 'we' (Alex couldn't help much with her cast on) made this cute snowman... out of Ivory soap! You can find the instructions at Craft Elf.


First, we used a cheese grater to grate the Ivory soap - it is very simple to do! (I used 2 bars, but had some left over.)


Then you add a little water at a time until you can work with the soap. Next, you make the 3 balls. It is a little difficult to make a ball. I've never worked with anything like it and don't know what to compare it to. I worked on a piece of wax paper and I also used a toothpick through the middle of the snowman for stability!


We were using supplies we had on hand, so we used food coloring for the buttons, eyes, and mouth. I just made little puddles of the food coloring on a paper plate and dipped the toothpick in it. Then I "poked' the color into place. For the nose, I mixed red & yellow food coloring, died the end of a toothpick orange, and broke off the tip of the toothpick to use as a nose.


Lastly, I cut up a sock (I used the other sock the other day to make a cover for Alex's cast. It is kind of scratchy and she now sleeps in the sock to keep from scratching herself. A handy hint from my sister-in-law!) I cut a strip of sock for the scarf and used the toe end of the sock to make a cap. I also added some soap flakes to the bottom of the snowman so he looks like he is sitting in snow.

UPDATE: This morning, the food coloring on our snowman had 'bled' and the colors were separating - for example, the blue eyes had red rings around them. If I did this craft again, I would use beads or small buttons. I think they were trying to keep the project as something you could actually use in the tub.

Friday, July 03, 2009

Unplug Your Kids: Tiny

For this week's Unplug Your Kids project, the focus was "tiny." I looked at the blog of This Girl Loves To Talk and followed her link to the Filth Wizadry blog. This blog is aimed at preschoolers, but I found some wonderful ideas! In fact, there are a lot of ideas I'm planning on trying. You should hop over to her blog and take a look!


We used her origami post to make "tiny" baskets (and also a couple of boats) and then used them for Alex's huge collection of Littlest Pet Shop toys. I'm sure Alex spent over an hour making these little boxes. I made 6 boxes and Alex made TEN!!! It was just a lot of fun and something we both enjoyed. (The actual link for the tutorial to make the baskets is at oragami-instructions.com.)

Monday, July 28, 2008

Unplug Your Kids - Flat

This week's theme at Unplug Your Kids was "flat." I had trouble coming up with an activity, and then ran across this neat art project which is done on paper... so it is FLAT.

I found the project at The Crafty Crow which is an incredibly great, crafty site for projects to do with kids. She links back to the site where she found the idea, at MollyCoddle. So, here is how we made our FLAT, watercolor blog drawings.


To do this project, you use watercolor paints and paint different colored "blobs" on your paper. You don't try to make them look like anything - just a strange blob. And, I wish we would have done more with 2 or more colors.

Then, you look at each blob, kind of like looking at clouds, and see what it looks like to you. You use a sharpie, and complete the drawing.

A's large-nosed man

A's helicopter
my butterfly

my lady with a bow
Please join us for next week's Unplug Your Kids' theme: ROUGH. We're having so much fun with these challenges!

Monday, July 14, 2008

Unplug Your Kids: Stones (or rocks)

For this week's challenge on Unplug Your Kids, the theme was STONES (or rocks). I found this idea for Hot Rocks at Wise Craft.

To make Hot Rocks, you put some rocks in the oven (we used a toaster oven) for 15 minutes at 350 degrees on a foil lined cookie sheet. Then carefully remove the rocks with oven mitts and place on a work surface - we used a cutting board. Using peeled crayons, you just touch the crayon to the surface and the crayon melts and "paints" the rock.


Though we liked how the rocks turned out, I think we enjoyed the process even more. It was so neat to watch the crayons melt! And, the finished product feels very waxy.

Monday, July 07, 2008

Unplug Your Kids: Garden

This is my 3rd post today as I'm trying to play "catch up" after our trip. I missed posting last week's "unplug your kids" challenge, though we did part of it before we left. So, here is last week's theme: garden.
We made the above origami flower which I found online. It uses 20 pieces of paper (actually 10 cut in half), so it turns out pretty large. You can find the instructions by googling for "simple 20 unit origami flower."

I'd also picked up a pack of 4 "friendship pin" kits for a dollar at Michaels. There were 2 dragonflies and 2 butterflies. You can find all of those in your garden, right? While I was at my mom's, I sat outside with Alexandra and 3 other kids in the driveway (ages 5, 7, 9 and 10) and we worked until 9 pm when it got too dark and we were getting too bit up. It was a wonderful way to spend a summer evening!

Unplug Your Kids: Clouds (or Sky)

This week's theme at Unplug Your Kids was "clouds." We got home last night from our 10 day trip, so I had to think fast. I think shaving cream looks a lot like clouds, so I thought I'd find something to do with shaving cream.

This was a fun and easy project. I found LOTS of versions on this craft and found this one at ZOOM today.
You basically squeeze some shaving cream onto a baking sheet (or piece of cardboard). Then you flatten it out and add a few drops of food coloring and mix them slightly. I like ZOOM's idea of using a plastic fork, but we used toothpicks, popsicle sticks, and a spatula.
Then you kind of squish a piece of cardstock on the shaving cream/food coloring mixture. Then, take a flat spatula and scrape off the excess.


I think I'm going to use this marbelized paper to make cards and/or bookmarks. I was disappointed how it curled up, but LOVE the effect!!! I think I made about 15 pieces of paper while Alexandra only made 3.

I think this looks best using only 2 colors or possibly 3. And, when it got too "mixed up", I would finish mixing it (like I mixed all of my yellow and green together to get a new base color) and then added another color (like blue).

I also wanted to point out that this project dries really quickly and you could easily use the pieces of paper for another project. I was using scrap pieces of cardstock, so they're pretty small. But, you could use this to make stationary. Let me know if you try this out!

Please join us for next week's theme: STONE

P.S. Oops! I just checked out Unplug Your Kids to submit my post and realized it was supposed to be "sky", not "clouds." Well, I guess my post is a stretch - about the clouds in the sky represented by shaving cream. :-)

Monday, June 23, 2008

Unplug Your Kids: OLD

Last week, I found a new blog called Unplug Your Kids. The goal is to "unplug" your kids and do something fun instead. Each week, she is giving a theme and you are to try to do something with that theme. We participated this weekend for the first time and had so much fun! I believe we'll continue doing this weekly - at least as often as we can.


The new posts are given on Monday and last week's theme (which you would post today) was "old." So, we pulled out a kit about "old", actually ANCIENT, Egypt. (The kit is a "Tresure Chests" called "Ancient Egypt" by "Running Press" which we bought used a couple of years ago.)


Here Alexandra is working with some of the hieroglyph stamps. She also worked on a necklace.

I worked on this grid drawing. It was harder than I thought it would be. We worked on this kit for about 30 minutes and it was so much better than watching TV or playing video games.
We also looked through some of the archives and tried some of their projects this weekend. This project was on the Unplug Your Kids blog under "sticky." We found some old containers and tore little pieces of masking tape and covered the containers. Then, we used shoe polish to "paint" it and give it this faux leather appearance. She found the original instructions here.
Morningstar Green Time had a project under "sticky" to make necklaces and Polly Pocket plates out of Elmer's glue.
You can use any container and use WASHABLE markers to color the bottom of it. (We used a mini muffin tin.) Then, you add a layer of Elmer's glue and let it set about 24 hours. It should be CLEAR when they're done. We LOVED watching the colors change!

Then, we pulled out our finished projects. Alexandra thinks she'll use them as plates, though we might make some of them into necklaces.


Morningstar Green Time also had a terrific post under METAL. You use tinfoil and "draw" on it. We used a very dull pencil, but pushed pretty hard on it. This dinosaur was my favorite creation. I drew it by looking at one of Alexandra's old coloring books. These pieces look a lot better (I think) if you use some texture - like the polka dots and stripes on his "hair."
I also tried using a little color with a Sharpie. Morningstar had a lot more colors of Sharpies than we do and I LOVE the look of their projects.
We'd love to have you all join us as we "Unplug Our Kids!"

Thursday, June 12, 2008

First Week of Summer


We've had a busy "first week of summer." Alexandra is in camp and I've been running lots of errands. I think June is just going to be a very busy month for us, and then July is pretty empty... at least for now!

Yesterday, while Alexandra was in class, I went out to take a nature walk with my camera. I've missed my nature walks! Another mom (actually a grandmother) of one of the students noticed me and pointed out a dragonfly. I took some photos and then sat down to talk with her. So, I didn't really finish my walk, but did enjoy my time outside. (I really got a pretty good photo, but you'll have to enlarge it to see it well.)
I'm still doing a lot of reading/studying about Classical education and am still not sure how we'll approach next year... but I'm pretty sure "we" will be studying Latin. And, I received Deconstructing Penguins in the mail yesterday and am considering using it as the basis for our book club next year. It teaches 2nd-5th graders about antagonists, protagonists, setting, character, etc.
I've run across some new blogs that are giving me lots of new ideas. I really intend to do lots of crafts & cooking with Alexandra this summer. So, I need to plan some of those activities. I found a "new" blog yesterday called Unplug Your Kids. She has a weekly "unplugged" craft challenge and then people come up with a project and post a link to their blog. (It's a lot like Barb's weekly Nature Challenges.) There are some GREAT ideas here and I can't wait to try some of them out!

Saturday, March 08, 2008

This Week's Wrap Up

We've had a busy week. (As usual, right?)


On Monday, we watched the baby of one of our neighbor's. We babysat for 6 hours to a 9 month old boy. Alexandra was SO helpful and I got to brush up on some baby skill as we await our new baby cousin in a few months. Alexandra even fed him his bottle and rocked him to sleep!

On Tuesday, we stated a kit about electricity. We used static electricity to pick up small pieces of paper with a comb and also to bend a stream of water - VERY cool!!!


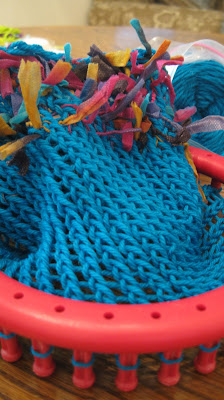
On Wednesday, we went to our small co-op and the mom & girls taught us how to loom knit! We are working on purses using wool yarn that we will then felt. I'll tell you more when we get to that step! We also had some fun with fractions at Mathwire.

We also played a new math fraction game, Closest to 1, which I found online but can't find right now. Each person is dealt 3 cards (take out J's, Q's, & K's). Then, make as many fractions as you can (you should make 6) and record each of them on a slip of paper. Then, calculate the decimal equivalent to the nearest 100th and write it down on the slip of paper. For example, 4/5 would be 0.80. I like going to the nearest 100th because then you can compare it to money! For difficult numbers, use a calculator. This is a good time to reinforce that the line in a fraction, like 1/2, means "divided by." After each person has their 6 answers, they should put them in order from smallest to largest and then determine which of their cards is closest to 1.00. (Again, use the concept of money, even draw a dollar sign, if this helps.) Then, compare your "closest" card with your opponents and whoever's is closest, wins! We played this several times and Alexandra really enjoyed it. She even wanted to play it at night!

On Thursday, we prepared for our Friday's book club by making a model of the Empire State Building with a "giant" peach on top. Then, Alexandra wrote a newspaper article about the amazing event from the book, James and the Giant Peach.


And, on Friday, we went to the book club and the girls made peach cobbler as their group acitivity. It was really good! They also shared their projects and had a group discussion.

Afterwards, Alexandra and I went clothes shopping and then she went to a Friday night out event at her gym while my husband and I went out to eat and then I went to Barnes & Noble. I got a book for me, The Wild Parrots of Telegraph Hill, and a book for Alexandra that she really enjoyed from the library last week, The Matchlock Gun.

Friday, February 15, 2008

Projects


What a busy, but fun, week! We went to three Valentine's parties and had lots of sweets - and lots left over. We did quite a bit of school, but we've really been concentrating on math.


Today, we went with our co-op friends to buy some yarn at a yarn store. Wow! There are so many to choose from! You'll have to stay tuned to see what we'll be making with this as Ms. S and her daughters teach us a few things.


Alexandra and I are hand-sewing a bunny from a kit. We cut it out a few weeks ago, and I'd made some mistakes. So, we fixed our problems tonight and got to start sewing. Alexandra helped with some of the whipstitching.


And, Alexandra whip stitched this little teddy bear about a month ago. She decided she didn't want any facial features. I got the pattern from another blog, but I don't remember which one right now! Didn't it turn out cute? I thought she did a great job!

And, our seeds we planted last week are really sprouting! In fact, we weren't expecting anything for about 10 days and the sunflowers (photographed today at 5 days) in less than 48 hours!

Wednesday, August 15, 2007

Nature Shirt


Just Call Me Jammin' had posted about some nature shirts she made with her children several months ago. This weekend, Alexnadra and I finally made her a shirt. It turned out so cute!


You spread some things from nature (we used leaves) on a dark shirt and then use a spray bottle to spray full-strength bleach on the t-shirt. Wait about 5 minutes and check to see if it is done. If it is, put in the washer immediately to wash. We washed it 2 times - once without soap and then a second time with soap. Let me know if you make your own creation!
Related Posts with Thumbnails